Running a Minecraft Server on Raspberry Pi

Minecraft is a sandbox video game developed my Mojang. It is one of the most popular video games in the world. In Minecraft Wikipedia page, it introduces:

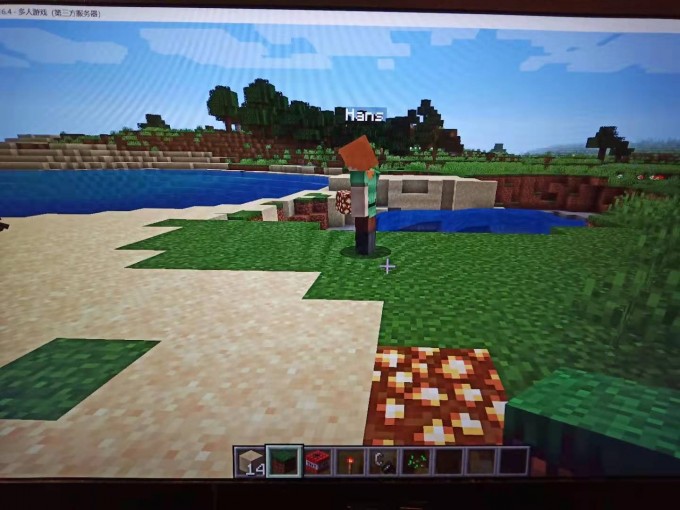
In Minecraft, players explore a blocky, procedurally-generated 3D world with infinite terrain, and may discover and extract raw materials, craft tools and items, and build structures or earthworks. Depending on game mode, players can fight computer-controlled “mobs“, as well as cooperate with or compete against other players in the same world. Game modes include a survival mode, in which players must acquire resources to build the world and maintain health, and a creative mode, where players have unlimited resources. Players can modify the game to create new gameplay mechanics, items, and assets.

If you want to play with your friends, an doable method is to pay $14.99 for an official server. Fortunately, we can also set up the server on Raspberry Pi with almost zero cost.

Java or Bedrock?

Notice there is two version of Minecraft. Java edition uses Java language and works only on PC. Bedrock edition uses C++ and works on Android, iOS, Nintendo, and Win10 PC. It is easy to set a multilayer server on Java edition. Just run the following command:

1
java -Xmx1024M -Xms1024M -jar minecraft_server.1.16.5.jar nogui

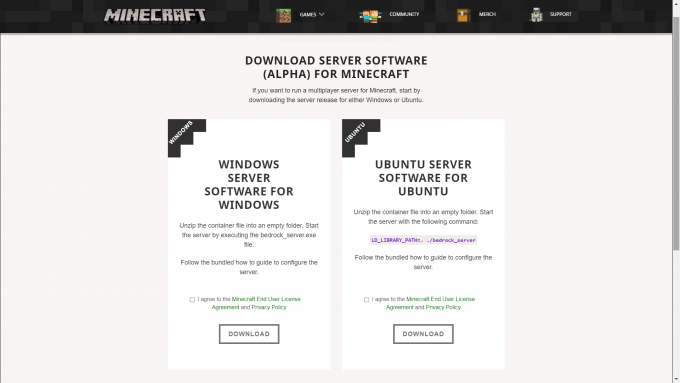
However, I want the server have a wider device compatibility, so I decide to set up a Bedrock server. Unfortunately, it only works on Windows or Ubuntu 64-bit system. For some unknown reason, though Raspberry Pi 4B has a 64-bit CPU, its operating system Raspbian is still 32-bit. I manage to install a third-party Debian but still cannot run the Ubuntu package.

6LOPDH.md.png

So I have to use third-party server package. And here it is, https://getbukkit.org/

Configuration

1 After downloading the jar file, FTP the file to Raspberry Pi

2 Writing a sh script to simply the start up process. As you need to allocate the RAM every time.

1
sudo nano runserver.sh 	//making a new sh file and edit with nano

Type in:

1
2
3
4
5
6
7
while true

do

sudo java -Xms768M -Xmx1024M -jar /home/mc.jar nogui

done

After done, Ctrl+O to write the file and Ctrl+X to exit.

Note that -Xms and -Xmx indicate the maximum and minimum RAM the server can use. nogui means run without user interface.

Running the server

1
sh runserver.sh 

The sever cannot run successfully at first time as you need to agree the EULA statement first. Stop the server, open eula.txt with nano:

1
sudo nano eula.txt

Change eula to true:

1
eula=true

Run the server again:

1
sh runserver.sh 

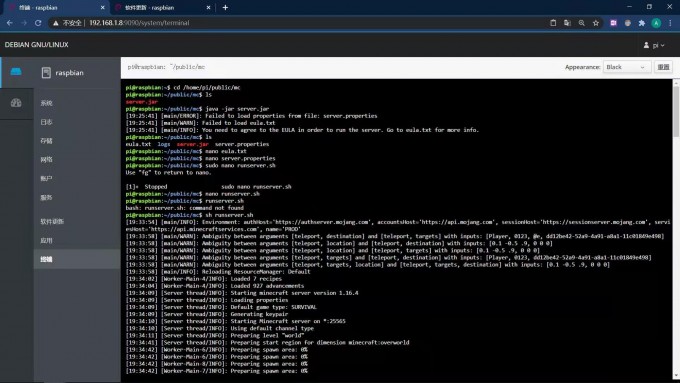
And the server is running!

Change server properties

Open server.properties with nano:

1
sudo nano server.properties

The server properties can be changed in the file. These is the explanation from Offical Minecraft Wiki

1
2
3
4
5
6
7
8
9
10
11
12
13
14
15
16
17
18
19
20
21
22
23
24
25
26
27
28
29
30
31
32
33
34
35
36
37
38
39
40
41
42
43
44
45
46
47
48
49
50
51
52
53
54
55
56
57
58
59
60
61
62
63
64
65
66
67
68
69
70
71
72
73
74
75
76
77
78
79
80
81
82
83
84
85
86
87
88
89
90
91
92
93
94
95
96
97
98
99
100
101
102
103
104
105
106
107
108
109
110
111
112
113
114
server-name=Dedicated Server
# Used as the server name
# Allowed values: Any string without semicolon symbol.

gamemode=survival
# Sets the game mode for new players.
# Allowed values: "survival", "creative", or "adventure"

force-gamemode=false
# force-gamemode=false (or force-gamemode is not defined in the server.properties)
# prevents the server from sending to the client gamemode values other
# than the gamemode value saved by the server during world creation
# even if those values are set in server.properties after world creation.
#
# force-gamemode=true forces the server to send to the client gamemode values
# other than the gamemode value saved by the server during world creation
# if those values are set in server.properties after world creation.

difficulty=easy
# Sets the difficulty of the world.
# Allowed values: "peaceful", "easy", "normal", or "hard"

allow-cheats=false
# If true then cheats like commands can be used.
# Allowed values: "true" or "false"

max-players=10
# The maximum number of players that can play on the server.
# Allowed values: Any positive integer

online-mode=true
# If true then all connected players must be authenticated to Xbox Live.
# Clients connecting to remote (non-LAN) servers will always require Xbox Live authentication regardless of this setting.
# If the server accepts connections from the Internet, then it's highly recommended to enable online-mode.
# Allowed values: "true" or "false"

white-list=false
# If true then all connected players must be listed in the separate whitelist.json file.
# Allowed values: "true" or "false"

server-port=19132
# Which IPv4 port the server should listen to.
# Allowed values: Integers in the range [1, 65535]

server-portv6=19133
# Which IPv6 port the server should listen to.
# Allowed values: Integers in the range [1, 65535]

view-distance=32
# The maximum allowed view distance in number of chunks.
# Allowed values: Positive integer equal to 5 or greater.

tick-distance=4
# The world will be ticked this many chunks away from any player.
# Allowed values: Integers in the range [4, 12]

player-idle-timeout=30
# After a player has idled for this many minutes they will be kicked. If set to 0 then players can idle indefinitely.
# Allowed values: Any non-negative integer.

max-threads=8
# Maximum number of threads the server will try to use. If set to 0 or removed then it will use as many as possible.
# Allowed values: Any positive integer.

level-name=Bedrock level
# Allowed values: Any string without semicolon symbol or symbols illegal for file name: /\n\r\t\f`?*\\<>|\":

level-seed=
# Use to randomize the world
# Allowed values: Any string

default-player-permission-level=member
# Permission level for new players joining for the first time.
# Allowed values: "visitor", "member", "operator"

texturepack-required=false
# Force clients to use texture packs in the current world
# Allowed values: "true" or "false"

content-log-file-enabled=false
# Enables logging content errors to a file
# Allowed values: "true" or "false"

compression-threshold=1
# Determines the smallest size of raw network payload to compress
# Allowed values: 0-65535

server-authoritative-movement=server-auth
# Allowed values: "client-auth", "server-auth", "server-auth-with-rewind"
# Enables server authoritative movement. If "server-auth", the server will replay local user input on
# the server and send down corrections when the client's position doesn't match the server's.
# If "server-auth-with-rewind" is enabled and the server sends a correction, the clients will be instructed
# to rewind time back to the correction time, apply the correction, then replay all the player's inputs since then. This results in smoother and more frequent corrections.
# Corrections will only happen if correct-player-movement is set to true.

player-movement-score-threshold=20
# The number of incongruent time intervals needed before abnormal behavior is reported.
# Disabled by server-authoritative-movement.

player-movement-distance-threshold=0.3
# The difference between server and client positions that needs to be exceeded before abnormal behavior is detected.
# Disabled by server-authoritative-movement.

player-movement-duration-threshold-in-ms=500
# The duration of time the server and client positions can be out of sync (as defined by player-movement-distance-threshold)
# before the abnormal movement score is incremented. This value is defined in milliseconds.
# Disabled by server-authoritative-movement.

correct-player-movement=false
# If true, the client position will get corrected to the server position if the movement score exceeds the threshold.


server-authoritative-block-breaking=false
# If true, the server will compute block mining operations in sync with the client so it can verify that the client should be able to break blocks when it thinks it can.

Port Forwarding on Ngrok

You may notice the server can only be found in local network. How can I invite friends all around the world to the server? Port forwarding is a easy option.

In computer networking, port forwarding or port mapping is an application of network address translation (NAT) that redirects a communication request from one address and port number combination to another while the packets are traversing a network gateway, such as a router or firewall. This technique is most commonly used to make services on a host residing on a protected or masqueraded (internal) network available to hosts on the opposite side of the gateway (external network), by remapping the destination IP address and port number of the communication to an internal host. —From Wikipedia

Port forwarding can be set by logging in the wifi configuration page. The step may be varying for different network providers. I set up easily on my Rogers wifi–just a few clicks.

Port forwarding doesn’t work?

In some cases, network providers disable port forwarding as they have limited IP address. In this case, we can use Ngrok VPN tunnel instead.

Ngrok exposes local servers behind NATs and firewalls to the public Internet over secure tunnels. –From Ngork

Set up Ngrok is also straight-forward.

1 Register an account on Ngrok website and go to https://dashboard.ngrok.com/get-started/setup. Download Linux(ARM) file. FTP to Raspberry Pi and unzip

2 Add your authtoken.

1
./ngrok authtoken 'your private authtoken'

3 Start tunnel. Note that Minecraft server uses tcp and port 25565. If you want to forward website or email services, notice they uses different agreement and different port.

1
./ngrok tcp 25565

4 Check the tunnel IP address on https://dashboard.ngrok.com/endpoints/status. Enter the IP address in Minecraft. The server should be able to connect.

6LLit0.md.jpg

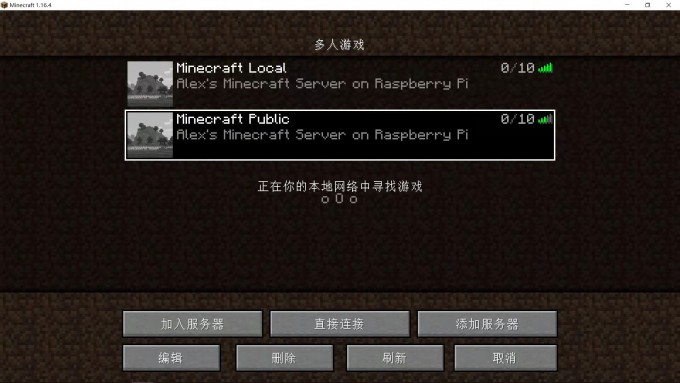
Multilayer is also supported.

6LLPkq.md.jpg


Running a Minecraft Server on Raspberry Pi
http://alexhcgu.github.io/2020/12/20/mcserver/
Author
Alex Gu
Posted on
December 20, 2020
Licensed under